Want to boost your online sales? Look no further than levitation product photography.
In this simple guide, I’ll explain how to create your floating product photos, covering everything from the basic tools and equipment to post-processing techniques.
Keep scrolling!
What is Floating or Levitation Product Photography?
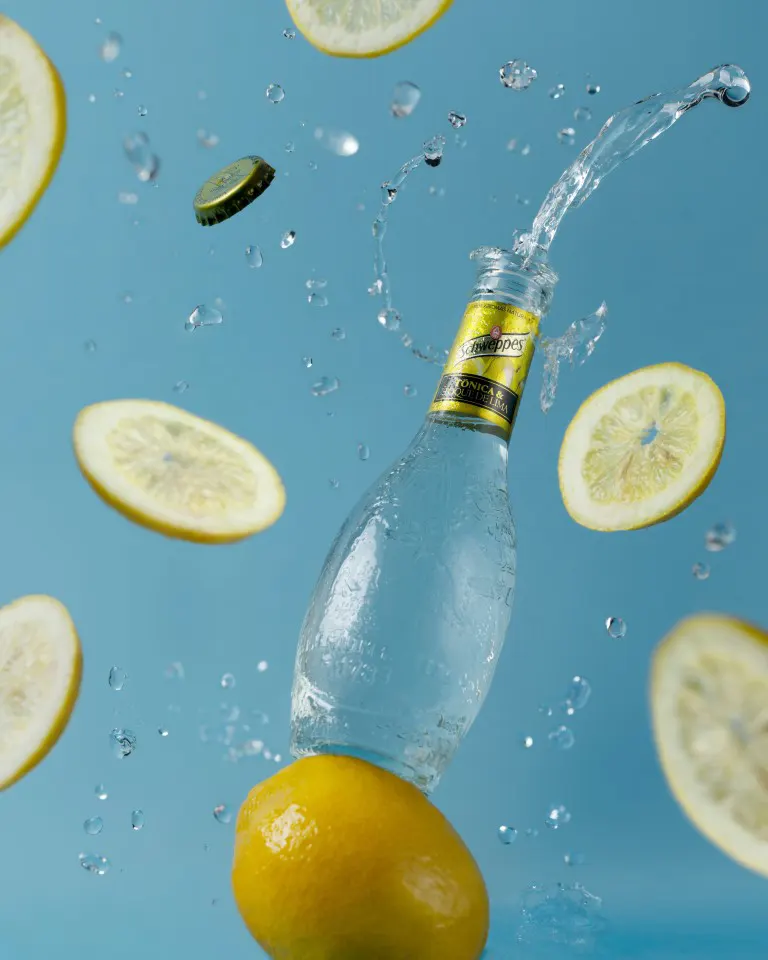
Floating or Levitation product photography is a technique that creates the illusion of a product floating in mid-air, which makes it appear more visually appealing and interesting to potential customers.
This style of photography has gained popularity in e-commerce due to its ability to showcase products uniquely and engagingly.
Basic Tools and Equipment for Levitation Product Photography
Before you begin creating your floating product photos, you’ll need the right tools and equipment.
Let me provide a comprehensive list of the required tools and equipment for floating product photography, and offer tips on how to choose the right gear to achieve the best results.
1. Camera
You’ll need a high-quality camera that is capable of capturing sharp and detailed images.
A DSLR or mirrorless camera with manual controls is recommended.
2. Lens
A macro lens is ideal for capturing close-up shots of small products.
Alternatively, a standard zoom lens can work well for larger products.
3. Tripod
A sturdy tripod is essential for keeping your camera steady and preventing shaky shots.
A tripod with adjustable legs and a ball head for maximum flexibility will be best for capturing perfect floating product photos.
4. Stands
Stands may be required to keep your product stable, depending on the techniques you have chosen.
5. Lighting Equipment
You’ll need lighting equipment such as strobes, softboxes, or ring lights to create different effects and avoid harsh shadows.
6. Lightbox
A lightbox provides even lighting and helps to prevent shadows in your photos.
Look for a lightbox with adjustable brightness and color temperature.
7. Background
Choose a suitable background, such as a white or black backdrop, to create a neutral and distraction-free setting.
8. Props
Other props or materials, such as transparent acrylic sheets, fishing lines, or invisible mannequins, can be used to create the floating effect.
When choosing gear, it’s important to consider your specific needs and budget.
For example, if you’re just starting with floating product photography, you may not need the most expensive gear.
Look for gear that suits your level of expertise and the products you plan to shoot and don’t be afraid to experiment with different techniques and equipment to achieve the best results.
How to Setting Up a Levitation Product Photography Studio
Setting up a floating product photography studio requires careful planning and attention to detail.
But don’t worry, I will tell you the most important steps to help you!
1. Choosing the Right Location
Select a location that provides ample natural light and space to move around.
Consider a room with a large window or an outdoor space that offers diffused light for the best results.
2. Preparing the Background
Choose a clean and neutral background that complements the product.

A white or black background is commonly used, but you can experiment with different colors, canvas, and textures to find the best fit for your product.
3. Setting Up the Lighting Equipment
Position softboxes or diffusers to create even lighting and minimize shadows.
Adjust the intensity and direction of the light to highlight the product’s features and create a sense of depth.
4. Positioning the Camera and Tripod
Place the camera and tripod in the optimal position to capture the product from the desired angle and height.
Ensure that the product is centered and in focus, and adjust the camera settings accordingly.
5. Creating the Floating Effect
Use techniques to create the floating effect.
Experiment with different techniques to find the one that works best for your product, and adjust the camera settings accordingly to achieve the desired result.
The following video will give you a clear-cut idea about how you can do levitation product photography at a studio
6 Techniques for Achieving the Floating Effect on your product photography
There are several techniques available for achieving the floating effect in product photography. Among them, the following techniques are commonly used in product photography.
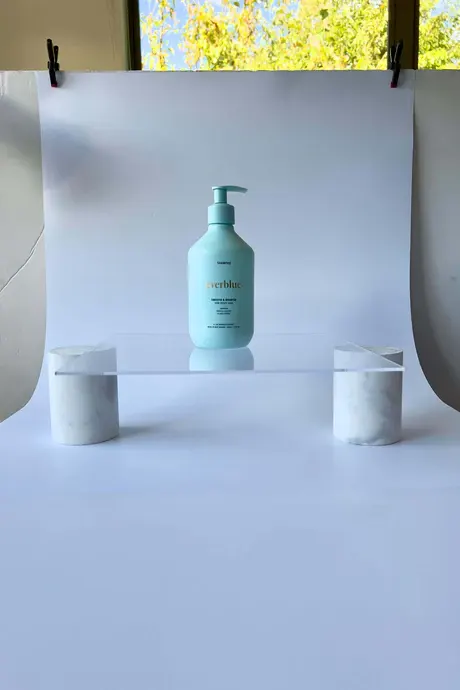
1. Using Transparent Acrylic Pieces
Source: propface.co
Source: backdropsnz.nz
Using transparent acrylic pieces is one of the most popular techniques for achieving the floating effect in product photography.
The advantage of using acrylic pieces is that they are affordable, easy to find, and provide a solid base for the product.
The downside is that they may reflect light and create unwanted glare in the photo.
2. Using Fishing Line
This method involves suspending the product in mid-air using a thin and transparent fishing line.
Using a fishing line is that it is invisible in the photo, providing a truly levitating effect.
However, it requires careful positioning and may require additional time for post-processing to remove the fishing line from the final image.
Refer to this short video clip for more clear idea.
@bwillismedia Anyone can do this and the results are insane!! 📸 #productphotography #photographytrick #photohack #floatingphotography #phototips
♬ Levitating – Dua Lipa
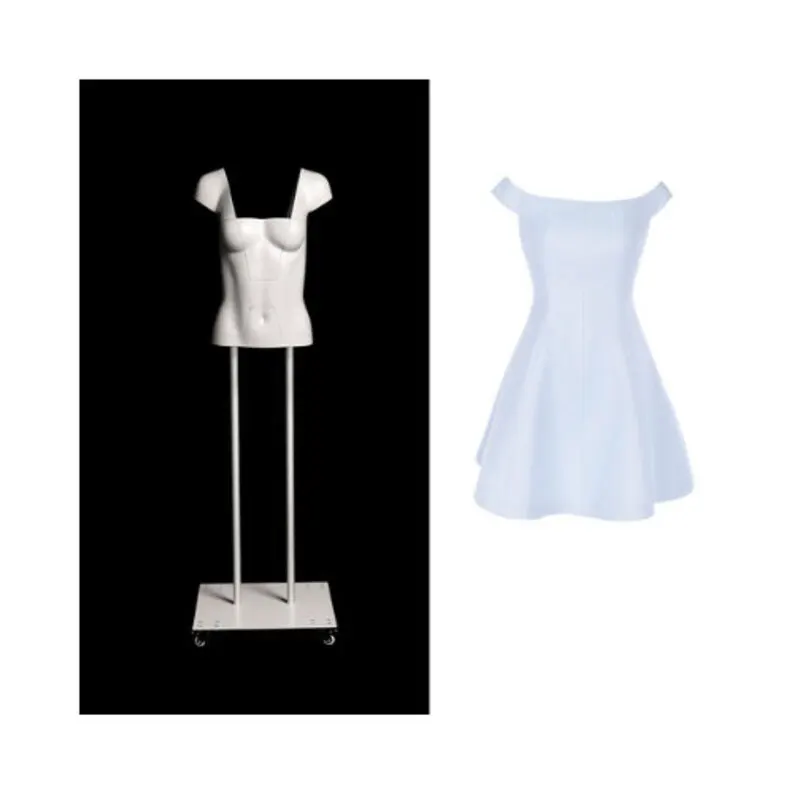
3. Using Invisible Mannequins
Source: etsy.com
Using invisible mannequins is a technique that is particularly useful for levitation clothing product photography.
Here, you can use a mannequin or dress form that is painted the same color as the background.
Bytheway, I wrote an article about how do you photograph clothes with mannequins effect 3D your clothes. You can refer to it for a guide on photographing your floating fabric using invisible mannequins.
The benefit of this technique is that it allows the clothing to appear as if it is being worn without any visible support.
But, it needs more advanced skills and may not work for products that are not clothing.
4. Using Magnetic Levitation

Source: digitalzakka.com
This technique uses magnets to suspend the product in mid-air.
It allows for more precise control over the floating effect, but requires specialized equipment and can be more expensive.
Check the latest price of a magnetic levitation if you want to purchase one.
5. Using Mirror Reflection
Using a mirror or reflective surface to create the illusion of floating is another technique.
It can be done with minimal equipment, but requires a precise setup and may not work for all products.
6. Using Post-Processing Techniques
This method involves manipulating the image in editing software to create the illusion of the product floating in mid-air.
The advantage of post-processing is that it can be used with any product, but the downside is that it requires advanced editing skills and may not produce the same level of realism as the other techniques.
If you wanna know how to photograph floating products using simple post-processing techniques, check out this short video.
@josh.peters Here’s 1 technique I use to make my product shots float! 🧢 #phototrick #photoediting #homephotoshoot #homephotohacks #learnontiktok @tiktok_uk
♬ I See Red – Everybody Loves An Outlaw
Post-Processing the Floating Product Photos
After capturing levitating product photographs, I always prefer to do post-processing to enhance the quality of photos.
This includes basic editing techniques such as adjusting exposure and white balance, as well as advanced techniques like compositing and retouching.
There are various tools and software available for post-processing.
Adobe Photoshop and Lightroom will give me the best results always.
If you wanna only make some basic techniques, it can be achieved with free software like GIMP. Advanced techniques may require more experience and skill.
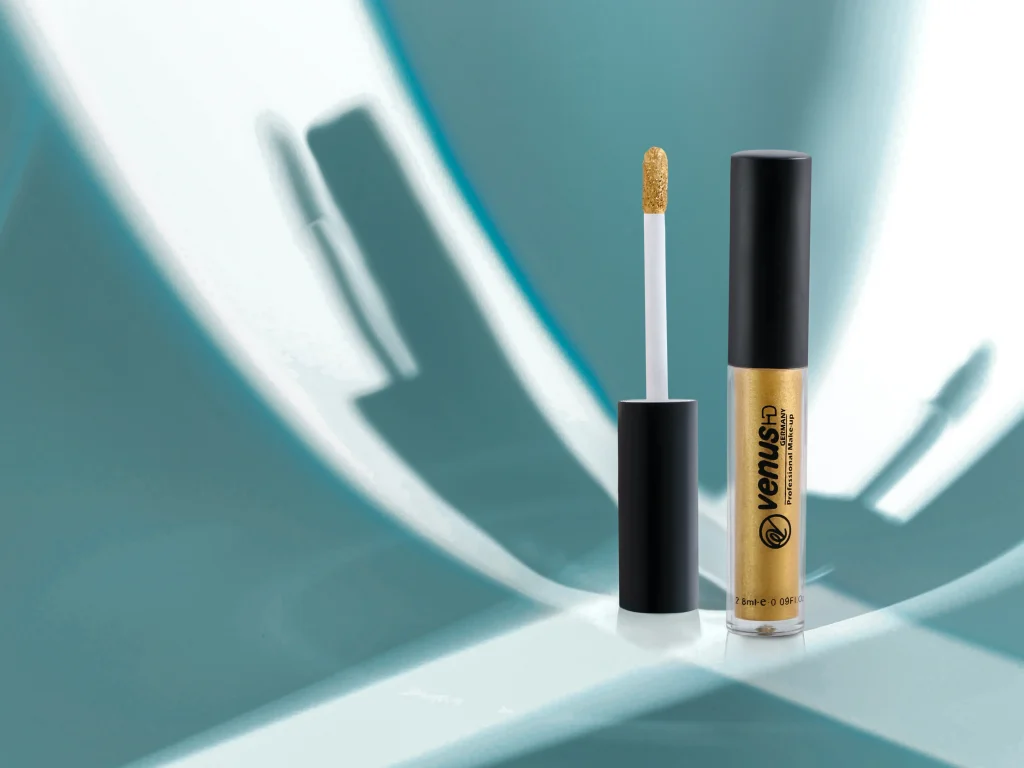
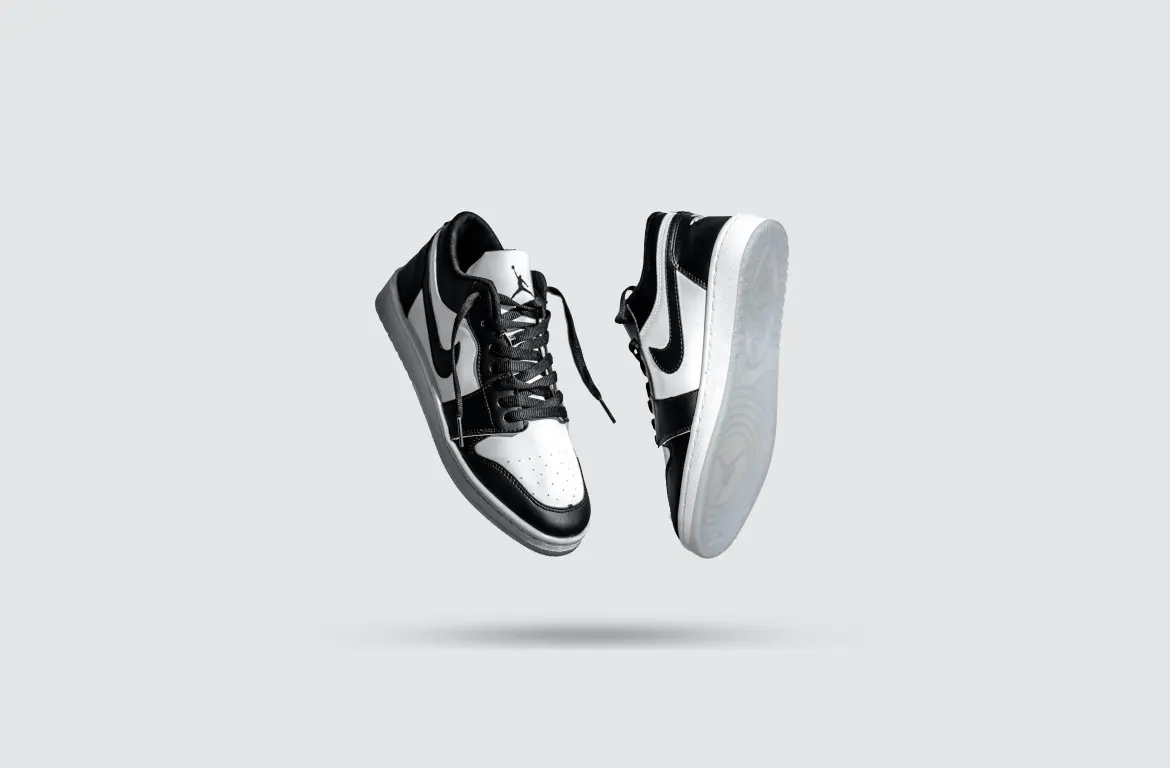
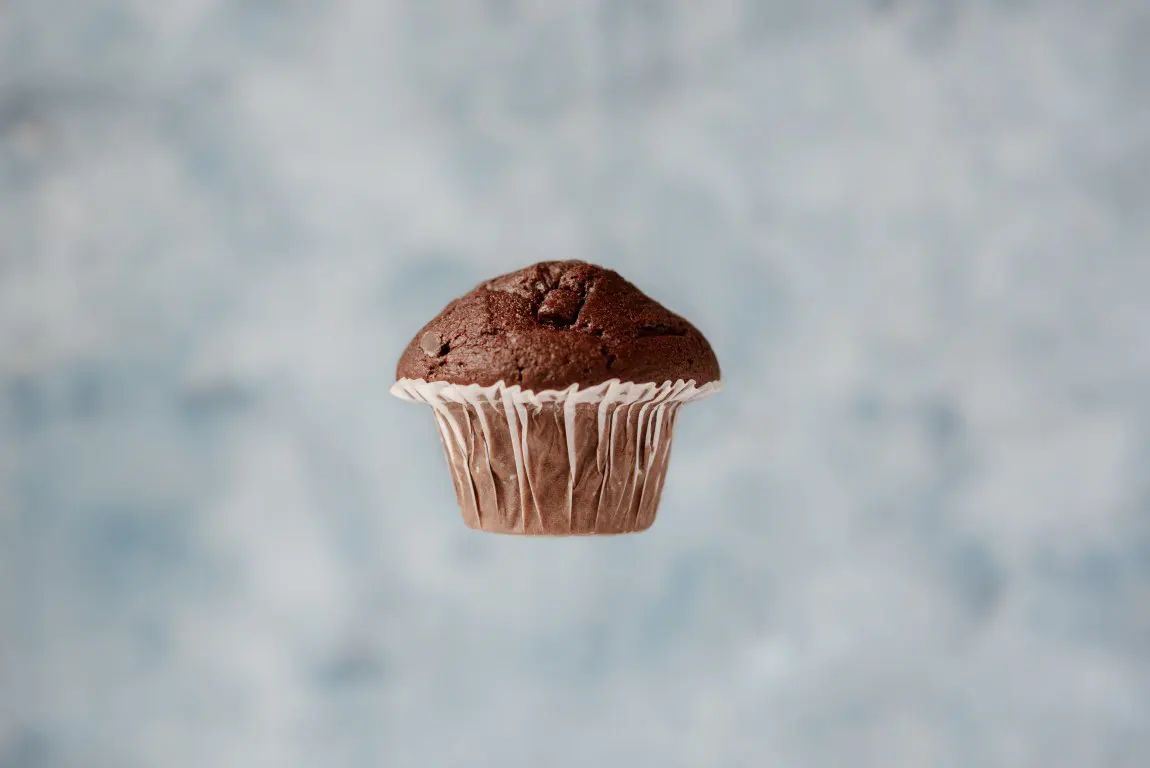
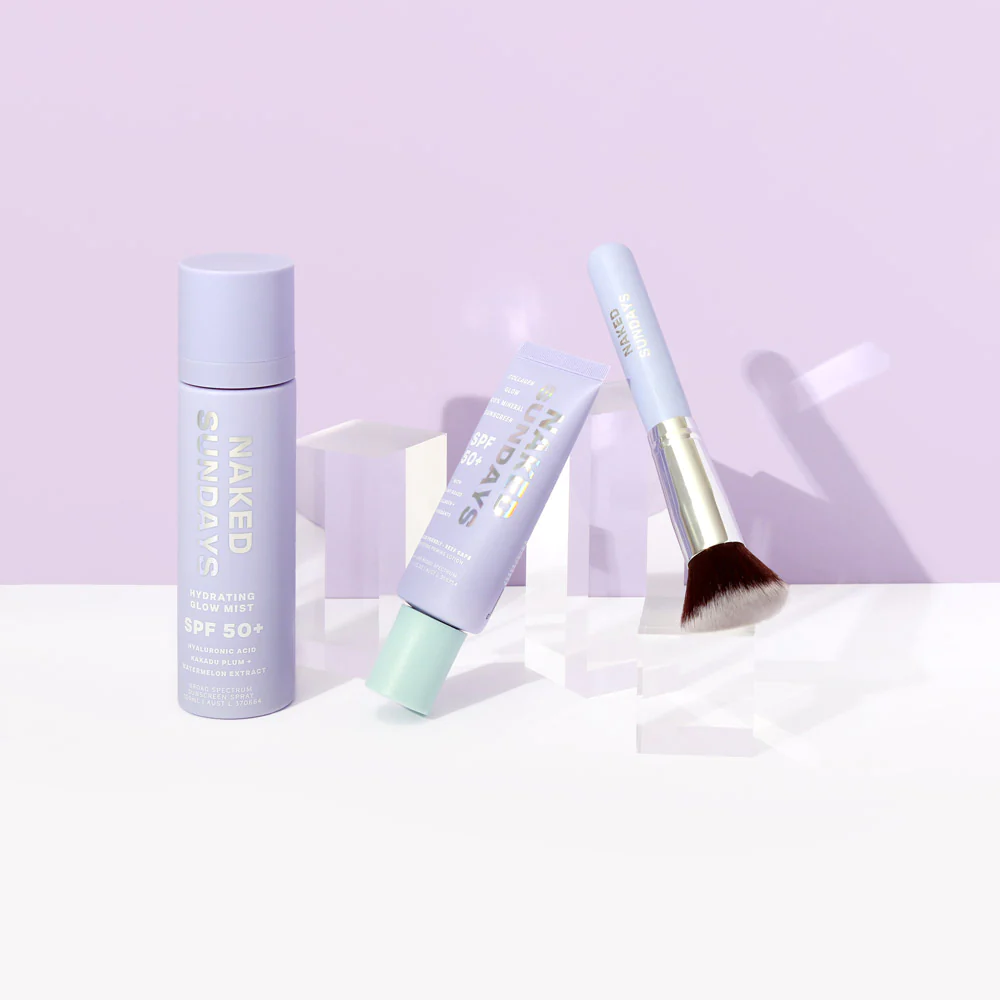
Levitation Product Photography from Popular Brands
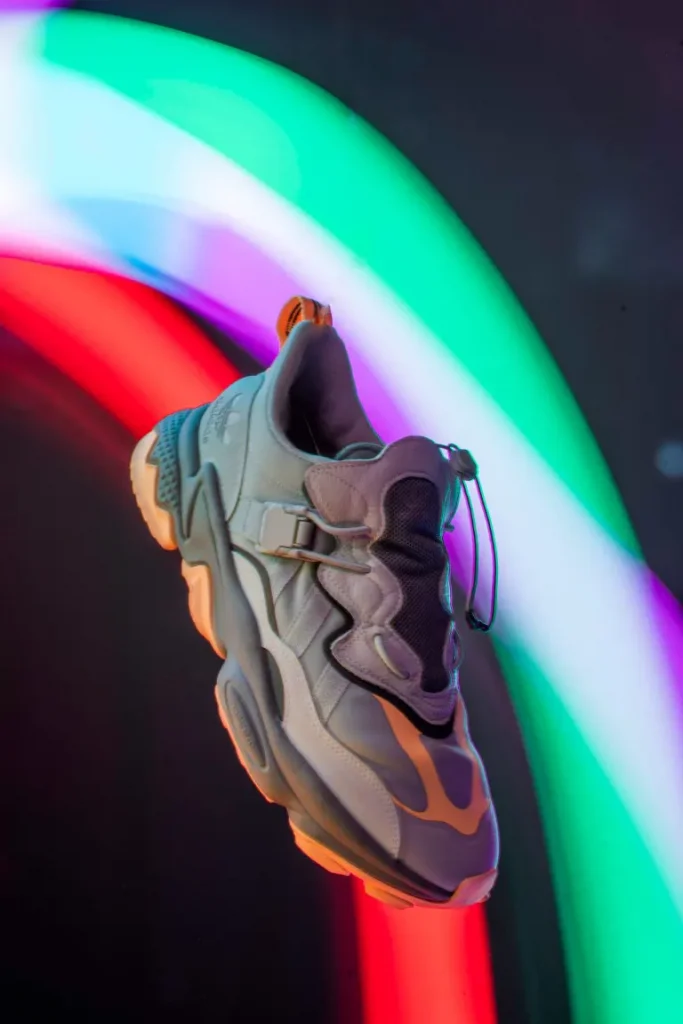
I always get inspired by popular brands and their floating product photography to see what works and what doesn’t.
You can also try it. Analyzing their approach can help you improve your techniques and stand out in a crowded market.
However, it’s important to not copy or imitate their work but to use it as a source of inspiration to create something unique and original.
Conclusion
In conclusion, levitation product photography can greatly enhance the visual appeal of your e-commerce products and increase sales.
By following the right techniques, using the appropriate tools and equipment, and paying attention to details, you can produce stunning product shots.
By the way, to try this technique at home; without a studio setup, I recommend you to watch the following video.
Post-processing can also improve the quality of your images, making them even more effective in attracting customers.
With these tips and techniques, you can take your product photography to the next level and boost your business’s success.
Justin Parker is a professional photographer and has been in the industry since 2007. He attended the University of Georgia. Justin combines his passion for photography and his interest in writing to give life to this blog which talks about photography in order to help and inspire young photographers.