Photographing shiny products including watches, jewelry, sunglasses, and other reflective products is quite difficult since they offer high reflections while capturing their photos.
However, if you know the ways and techniques how to minimize and eliminate unwanted reflection, taking photos of these shiny products will be easier for you.
This is why, in this article, I will provide you with some tricky camera techniques while also providing camera and light setup methods and other information as well.
So, you don’t have to experience any unexpected situations due to these highly-reflective products and also can avoid this frustrating reflection.
All right, let’s start the article without wasting much time!
Camera settings and equipment to avoid reflection
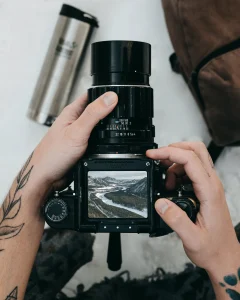
To avoid reflections of the shiny products, the first thing you have to consider is how you have set up your camera settings and all other equipment as well.
Once you’ve learned the tricky camera techniques to configure the camera settings for photographing shiny objects, you can easily minimize as well as eliminate reflections.
Here, I have provided some useful camera settings along with the necessary equipment that you will require while shooting reflective products.
Follow them to avoid glare-
- Turn off the flash and use the automatic white balance of your camera to the flash setting. Adjust this white balance as per the internal menu of the camera.
- Remember that in case of an emergency you should not use the flash that is attached to your camera and also use some light diffusion tools to avoid glare.
- Use the camera’s aperture priority mode to control the camera sensor and what it can reach or you can use manual mode to control your camera’s interpretation regarding how it can light as well as record your captured photos of the reflective products.
- Make the shutter speed of the camera faster; use a narrow aperture which indicates a larger f- such as f/11 or f/16 and the lowest ISO setting for example ISO 100.
- Use less depth of field to eliminate the reflections in a photograph while capturing shiny product photos. This will help you to provide enough clarity to the reflective objects.
This camera setting will help you to capture better photographs of your shiny products and also provide the most details while avoiding reflection as well.
Lighting setups and tricks to photograph shiny products
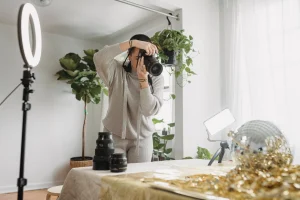
When it comes to capturing pictures of shiny materials or metallic objects, you need to diffuse the light as lighting setups. For this, you should use some inexpensive, however, ideal lighting setups that will help you to take a great photograph of clear yet shiny objects.
Here, I’ve come up with some feasible lighting setups, check out and choose any of these that you think are appropriate for your shiny products;
- Box backlighting
To shoot transparent or clear products such as glass, use a box backlighting setup that will provide a crystal clear-looking appearance.
For this, you have to place your light source behind the shiny products.
Keep the light diffuser just between the product and the light; put white foam boards on the top, both sides, and under your products. Now, the soft light reflects back evenly from all the sides onto the products as they are wrapped around.
- Side lighting
While capturing detailed reflective products such as watches, sunglasses, etc., you will need side lighting setups.
For this lighting setup, you need to place a continuous or strobe light that is diffused directly by an umbrella to the left side of your reflective products.
- Double overhead lighting
To photograph metallic products such as jewelry, cutlery, pots, pans, etc. you need to use a double overhead lighting setup.
Here, you will require a white paper sweep, two lights- it can be either continuous or strobe although the strobe light is recommended for you, and two umbrellas.
First, you have to put the light source on each side of the metallic products. Now, you need to diffuse them by using two umbrellas. After that, angle the lights down just at your product while setting each of them to the same power.
Now, use a tripod to position the camera and angle it down slightly while also sweeping down the white paper just under the product. And then fasten it to reduce the fall-off glares.
How to photograph larger shiny objects?

To photograph larger shiny objects such as shooting landscape photos with a body of full water, or capturing larger vehicle photos such as cars, you can’t use your studio lighting.
For this, you have to follow some photography tricks and choose the right light source and time to capture the larger shiny object’s photos.
For example, you need to use the golden hour of the day. It indicates the first and last few hours of available sunlight during the day.
This is because, during these hours, you will get low sunlight that is appropriate to photograph larger shiny objects and also to prevent harsh shadows as well as eliminate reflections.
Besides, you can also choose an overcast day to take pictures of larger objects. This will also minimize glares as well as unwanted shadows on your products that are too large in size where you can’t diffuse your light source.
Best camera gear to photograph shiny products
Well, if you want to reduce glares while photographing shiny products, you should add some of the best camera gears to your camera bag or your studio.
However, here are some recommendations for you, try to use these tricks on your camera gear-
- Artificial lighting equipment
For your regular reflective products photography, you should use artificial, however, useful lighting tools as well as some advanced equipment for your studio lighting such as artificial light sources, light modifiers including umbrellas, diffusing papers, softboxes, reflective panels, etc.
- Lens hood
Photographing the shiny products through the glass walls will be so much challenging since it sucks the product’s details and produces unwanted reflections.
Therefore, to avoid this situation, you should attach a lens hood properly to the camera lens. After that, you need to directly place this hood against your camera glass.
- Polarizing filters
You can attach a polarizing filter to the camera lens to avoid reflections of the shiny products.
For different sizes of lenses, you will find a wide range of circular polarizing filters available coming in different sizes. Choose any of them as per your requirement and see how it reduces reflections dramatically.
- A tripod as well as a remote shutter release
While using an artificial or tabletop lighting system to photograph your shiny products, you should use not only a tripod but also a remote shutter release to prevent the shaking of your camera and also to avoid glares in your photograph.
How to edit photographs of Shiny Objects?

To edit photographs of shiny objects so you can enhance the image quality, you have to use several useful photo editing apps.
Here, I’ve compiled a list of some of the best editing apps, so you figure out these apps easily and can edit your photos on your own.
- Adobe Photoshop Express
- Adobe Photoshop Lightroom CC
- Snapseed
- Prisma Photo Editor
- VSCO
- Adobe Photoshop Fix
Justin Parker is a professional photographer and has been in the industry since 2007. He attended the University of Georgia. Justin combines his passion for photography and his interest in writing to give life to this blog which talks about photography in order to help and inspire young photographers.

