Drink photography is a whole heck of a job. You have reflections to deal with, not to forget the melting ice and unforeseen lighting issues. Thus, it is not a shock when beginners take decades to master how to take beautiful and elegant drink photos.
Good news!
You don’t have to take forever to learn how to take good drink photos. If you can only master a few tips and how to deal with lighting and reflection issues, you will be the most-looked-for drink photographer in a few months.
Reading this article will give you pro ticks to sharpen your skills and some of the ways you can uniquely style the scene to ensure everyone stops for a second after coming across your work. Roll up your sleeves, and let’s get into it!
Cold Drink Products Photography
Cold drinks are the order of the day, especially during the summer. However, taking their photos is one of the toughest jobs because you must ensure that you are quick enough to ensure that the ice doesn’t melt.
How do you ensure that your images of the cold drink are popping and the drink looks refreshing? I have some tips for you;
1. Use Very Cold Drinks
Yes! Your ice is cold, but you must also ensure that the drink temperature is below room temperature. Thus, it would help if you planned the photoshoot earlier to place the drink on the fridge overnight.
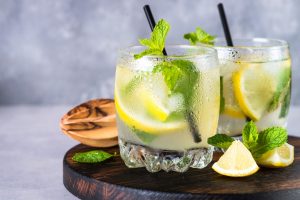
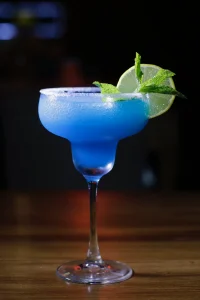
2. Add Frost Effects
The Frost effect gives the drinks a refreshing look. This effect can be achieved by placing the glass in a freezer before the photoshoot and holding it carefully when removing it to ensure that you don’t leave your fingerprints on the glass surface.
Apart from that, you can also mix a 50:50 solution of glycerin and water and spray the glass with a matting spray. This frost effect technique is highly recommendable if you take more than one photo of the same glass.
3. Garnish
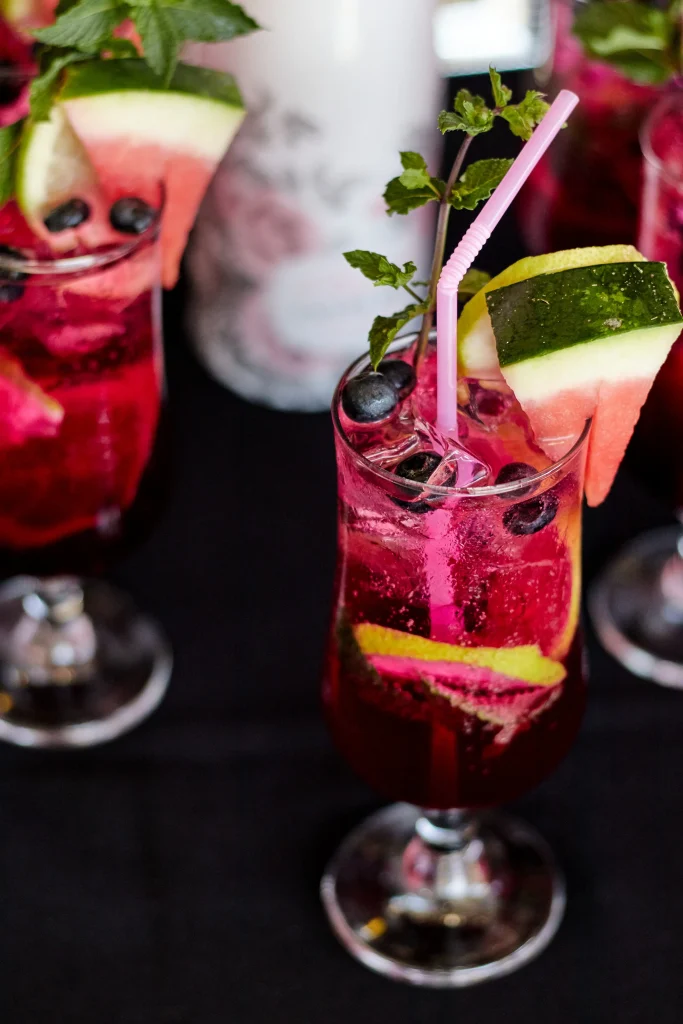
As a cold drink photographer, you must always ensure that the cold effect of the drink is evident in the images. You can do that by adding frozen garnish that enhances the frost appearance of the glass and berries if you have included them.
4. Add Ice
Ice cubes are must-haves when dealing with cold foods. However, when choosing the cubes, you must ensure that they are well-shaped and eye-appealing.
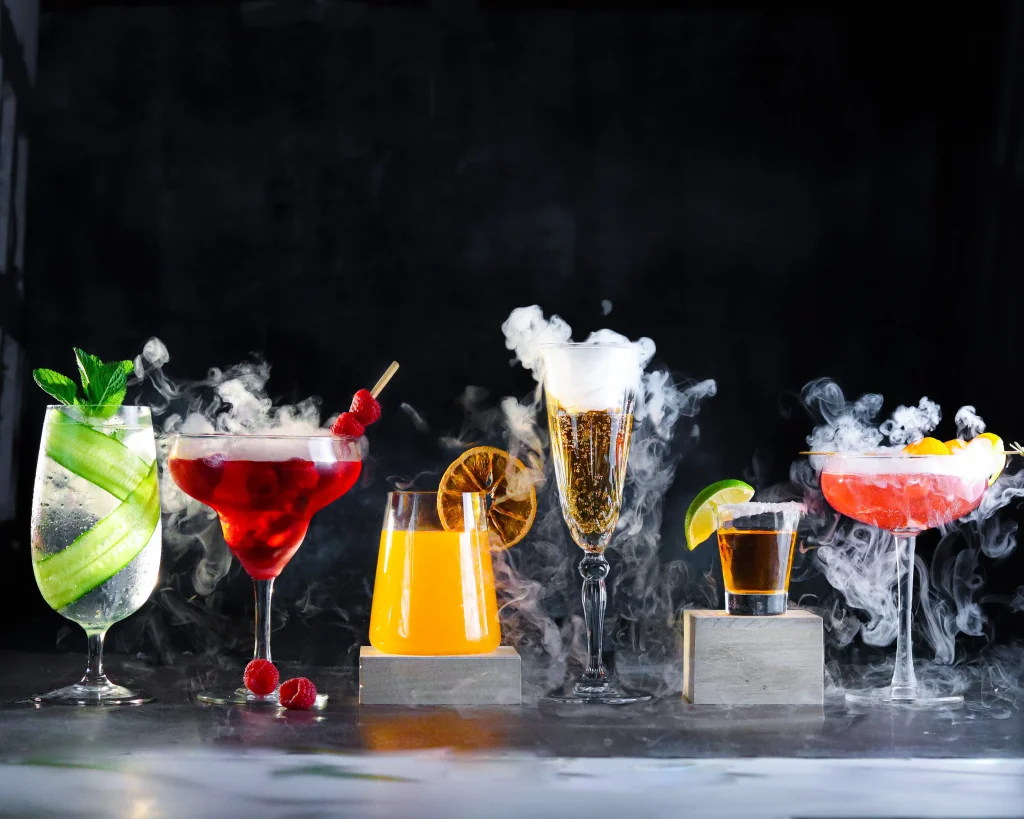
5. Add Salt or Sugar to Create Bubbles
Photos of beer or champagne look great when the bubbles are formed. Unfortunately, the bubble foam lasts for only a few seconds. Thus, such a situation may require multiple bottles if you need several photos, which may be uneconomical.
The solution is to add salt or sugar particles to the drink to help recreate long-lasting bubble foam for better and more appealing images.
Drink Photography Lighting
Keeping your skills aside, if you mess up with lighting, you will regret it. Nonetheless, getting the right position to place your light might be hectic, and now you have to struggle with multiple shadows.
If those are some of your struggles, we will deal with them one by one and ensure that your drink photos stand out.
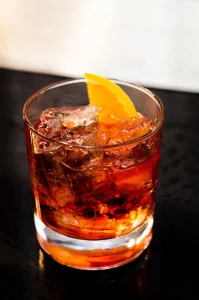
1. Use the Backlight
Backlighting is where you place the lighting source behind the object and facing the camera. In other words, the lighting source should be right in front of you.
It adds contrast and a dramatic effect making the environment unique and beautiful while emphasizing the object.
Are you sensing some problems with this type of lighting? Yes, the back part of the image may be well-lit while the front part is insufficiently lit. The solution is to adjust the light position and find a mechanism to bounce back the light.
2. Use Reflectors
Reflectors are objects that cause light rays to bounce back after hitting their surface. Simply, they reflect the light, hence their name.
In photography, they help to ensure that every part of the object is perfectly lit by preventing light displacement.
Thus, you can place a light reflector opposite the lighting to ensure that all parts of the objects are clear. A good example of a reflector is a white-colored foam core.
3. Double Diffusion
If the drink is in glassware, the glass can reflect anything in the room, and it goes without saying that your images will be ugly. Doesn’t that mean you change the glass? Not at all! Instead, use diffusers
Double diffusion helps create soft shadows that are hard to be noticed.
Also, you can cut a hole in the middle of the reflectors and place your lens through it.
4. Hard Lighting
Hard light has high contrast and unique brightness that can highlight the dark shadows of the image. Consequently, it exaggerates some parts of the image.
You can create this bright lighting using natural light or extra artificial light.
Best Lens for Drink Photography
Drink photography requires a high-quality lens with a relatively long focal length. The aperture should also be small enough to let more light get into the sensor for crispy and clear images.
Some of the lenses that we recommend for drink photography are;
- Canon EF-s – It is super light and has a 4-stop hybrid image stabilizer
- Tamron 90mm sp– High-tech optical path, super sharp sensor, and a 4-stop hybrid image stabilizer
- RF 35MM LENS– 0.5X macro magnification and a 5-stop hybrid image stabilizer
Drink Photography Props
For any successful photo shoot, you must have the correct props. Props vary depending on the type of shoot.
Below are some of the props needed for drink photography;
1. Tacky Putty
Tacky putty is an adhesive substance that is used to hold substances in place while shooting. You can also use it to mark the position of the props.
2. Microfiber Cloths
When shooting with a high-resolution camera, it will capture the tiny dust particles, not to mention the small fibers that may be left on the glass while wiping.
Thus, you need to have a microfiber cloth to wipe the glass because it doesn’t leave fibers behind.
3. Glycerin, Water Garnish
Cold drink photography looks best with frost. Thus, if you will have to create the frost, you need to carry glycerin, water, garnish, or any other item to make the frost.
4. Pouring Jug
Research indicates that people mostly believe in products that have a human element. Hence, you will need a serving jug to add a live-action and human element to your drink photos
5. Glass
This might look obvious, but it wouldn’t shock you to get to the scene and realize you have nowhere to pour the drink. Besides, the glass should be quite pretty and attractive. With glass photography, you can take awesome drink photos.
Drink Photography Styling Ideas
Keeping the fun fact of drink photography, you have a lot to deal with: the melting ice and reflection of light, not the unwanted shadows. Nonetheless, you are looking forward to a rewarding photo shoot with outstanding images.
Below are some of the tips on how to style the drink photography;
1. Have Realistic Objects
Yes! I know you want to be as creative as possible with the garnishes, ice cubes, and everything in the shoot. But don’t forget these are the same images that should attract a potential customer.
Consequently, the images should be realistic as possible and close to reality.
2. A Natural Setting for Hot Drinks
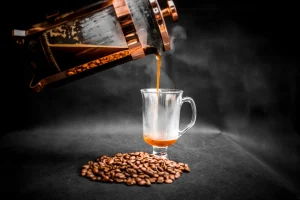
It is quite hectic to capture hot drinks with their steams, especially for beginners. The best approach to ensure that your images are pooping is to capture the hot drinks in a natural setting and add the steam using Photoshop.
3. Add Human Elements
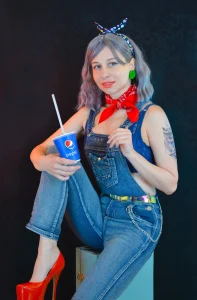
People easily trust images that have human elements. Thus, it would be wise to create a scene with a human either drinking or pouring out the drink.
4. Capture Splashing Drinks
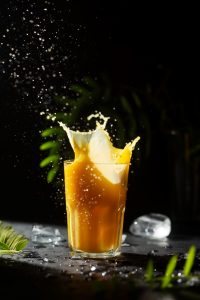
Splashes enhance images by creating a dynamic feeling. You can create splashes by dropping the drink or adding sugar or salt.
Whether you want to create a bright and cheerful drink product image or a dark and moody look, there is a product photography style that is perfect for your brand. Check out product photography styles essential for e-commerce.
Final words
Drink photography is quite challenging. You have reflections on dealing with messy melting ice, foams that can’t last for more than a second, and many other problems. Nonetheless, you can’t afford to put your brand at risk by capturing unattractive photos.
Newsflash!
We have conversed all you need to know to be the most looked-for drink photographer. Even better, we have offered a solution for dealing with light reflections and creating long-lasting bubbles and frost.
Justin Parker is a professional photographer and has been in the industry since 2007. He attended the University of Georgia. Justin combines his passion for photography and his interest in writing to give life to this blog which talks about photography in order to help and inspire young photographers.