Wildlife photography as a hobby has been increasing day by day. However, wildlife photography is no joke. The right instrument with the correct settings should be set before you decide to go shooting.
Are you also stuck on what camera works best for this kind of photography? What will be the necessary camera settings? If you have these questions as well, then this article is for you.
We will explain everything about wildlife photography and what possible camera settings you can set to get the best shots possible.
What Mode Does Wildlife Photographers Use?
Wildlife photography is no easy feat. Therefore, automatic settings do not sit well for clicking pictures of Wildlife.
One must use the Manual settings to shoot pictures along with an Auto ISO.
It also includes setting the shutter speed to a balanceable speed, and a wide aperture is used to capture as much light as possible.
When you use manual mode, you can control the shutter speed and the aperture as it may change around you.
It also helps the camera focus better and gets clear images instead of blurry ones.
There are several types of modes that are used while photographing, read about them below to know more.
What is The Best Setting for Wildlife Photography?
Shutter speed is a crucial thing in photography, especially in wildlife photography. It is even more important than aperture priority mode sometimes, but manual mode can also be used to click pictures.
There is a shutter priority mode as well; however, it isn’t used as much. All three modes can be used in various instances.
However, only aperture priority and manual mode are the most versatile of them all.
1. Aperture priority mode
If there is too much light or if it is frequently changing, you must use the aperture priority mode. This mode chooses on your behalf the best shutter speed that will fetch you a good result.
This mode will help you in surroundings where there is constant change in lighting.
2. Manual mode
This mode gives you complete hands-on control over your camera, for instance, where you want to capture shots such as flying birds or a bird flying from tree bark.
Manual mode allows you to set your settings according to your conditions, even low light situations. It allows flexibility in shots. Here, you have the controls in your hand to click the best shot.
However, it would take you time to set the camera and click the picture you want. So always be prepared before the shot and think of a shot before you click anything.
3. Shutter Priority Mode
This only allows you to control the shutter speed of your camera and can be useful in places like shooting a flying bird.
However, this would be the least usable since the shutter speed need to be controlled in the least amount of situations. Controlling the shutter speed will not give you any kind of flexibility.
Watch this video tutorial for more tips.
What is the Best Aperture for Wildlife Photography?
Aperture in wildlife photography is not that crucial; however, you still need a basic aperture for any click. Aperture helps you get better and clear pictures.
Therefore, f/6.3 is the minimal amount of aperture you would require, although f/7.1 or f/8 is generally used.
Now keeping the light in control of wildlife is impossible.
Therefore you need to control it yourself. Keep the shutter speed fast and a low ISO. This will fetch you the best picture of your life.
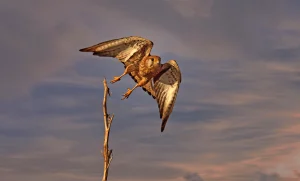
Aperture is crucial for places where there is a constant change in light, and you want to click animals that are moving at high speed. For instance, you see an eagle flying all over you, and you want to click its picture.
If you set the aperture to at least f/7.1, you will be able to click the picture with the best clarity and focus.
About Wildlife Photographer’s Flash Settings
Flash can be used as the main light. This way, the dark places would receive ample lights to get shown in the pictures, and the bright areas would stay lit already.
You can even use a flash modifier to show the flashlight from a distance. Some flash modifiers you can use are MagMod wildlife kits.
You can even use flash in low light situations with high aperture, and auto ISO turned on. However, this can only be done at the aperture priority mode.
When you are using the manual mode, you can set the shutter speed, the aperture, the focus as well as the ISO too.
Flash could, however, lead to too much exposure in the pictures; therefore, you must mind that.
Camera Settings for Wildlife Photography in Low Light
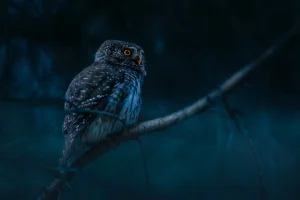
To attain the perfect photography, even in low light, you need to either use the aperture priority mode or the Manual mode. However, you should take care of a few things:
- Shoot at 1/1000s shutter speed for animals moving shots and even 1/4000s for some shots
- The aperture should be at least f/6.3 and can go up to f/7.1 or f/8
Canon 90D Settings for Wildlife Photography
It is fairly easy to use the Canon 90D; follow the following steps:
- The Canon EOS 90D has a maximum of 25,600 ISO that lets you shoot even in places with low light.
- The shutter speed must be at least 1/3200s, and that can go as low as 1/1000s.
- Resolution can be increased by about 15% to 24 megapixels.
- It has a Face tracking mode that has eye detection as well, which has proven to be an excellent tool for better focus.
- There are 45 autofocus points distributed around the camera’s optical viewfinder.
It provides the ultimate quality pictures at an affordable price.
Nikon d500 Settings for Wildlife Photography
When it comes to Nikon D500, follow the steps below:
- The best modes for wildlife photography using the Nikon D500 are Aperture priority modes and manual modes.
- You can use manual mode with the Auto ISO option so that you can set your aperture and shutter speed as you desire.
- The camera will adjust the ISO itself.
Nikon D500 has a DX sensor, an amazing autofocus performance as well a high ISO that makes it the best bid for wildlife photography.
Nikon D5600 Settings for Wildlife Photography
You can use the Nikon D5600 to its full potential by following the steps below:
- The image size must be greyed out.
- NEF recording must be 14-bit.
- ISO Sensitivity must be 100. You can turn on the Auto ISO sensitivity control.
- Maximum sensitivity should be 3200; with flash, it should be 3200.
- White Balance must be set on automatic.
- The color that you can use is RGB and sRGB if you are clicking a JPEG picture.
- Turn off the Active D-Lighting.
- Long exposure must be turned off.
- Auto distortion and Vignette control, along with High ISO NR, should be turned off as well.
- The manual focus ring in AF mode must be ON.
- ISO display must be on, and the shutter release button must be turned off as well.
The Bottom Line
Wildlife photography has a charm of its own! One could spend days just walking in the natural habitat, perusing through tall trees and capturing so many kinds of species in their natural surroundings. If you are also a photography enthusiast and want to try something apart from street photography or scenic photography, try wildlife photography.
However, if you feel like you do not know anything at all, read this article, and you will know everything there is to know, right from camera settings to the placement of the camera and what kind of camera would be a better purchase. Good Luck!
Justin Parker is a professional photographer and has been in the industry since 2007. He attended the University of Georgia. Justin combines his passion for photography and his interest in writing to give life to this blog which talks about photography in order to help and inspire young photographers.