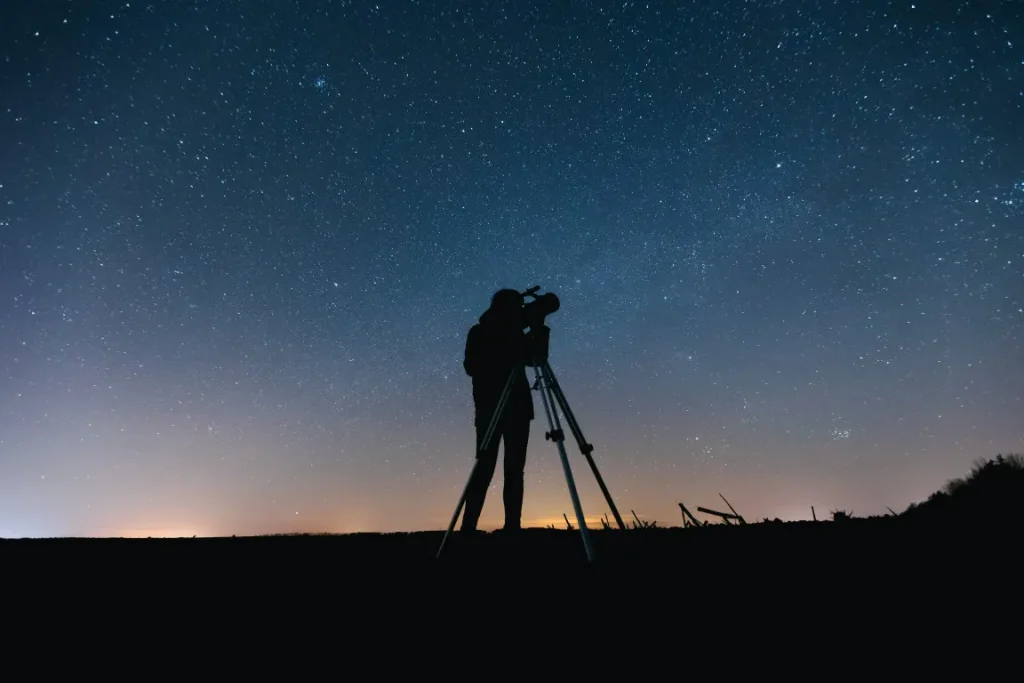
Telescope photography, often known as astrophotography, presents a captivating journey into the cosmos.
This intersection of science and art allows you to capture celestial wonders, showcasing everything from intricate lunar craters to the sprawling star fields of the Milky Way, right from your backyard.
One such technique pivotal to this process is the Prime Focus method, utilizing the telescope as the camera lens itself, rendering detailed, magnified images.
This comprehensive guide provides key insights on such techniques, along with in-depth knowledge on equipment setup, specific camera settings, and more.
Immerse yourself in this fascinating world of photography and let the universe be your muse.
Essential Equipment for Telescope Photography
Photography through a telescope, otherwise known as astrophotography, requires some essential pieces of equipment to ensure successful and impressive captures.
From telescopes specifically designed for photography, and reliable mounts, to specific adapters and lenses for your digital camera, each component plays a crucial role in your astrophotography journey.
Let’s reveal one by one.
Telescope:
A telescope is the primary tool for capturing celestial objects in astrophotography. When selecting a telescope for photography, consider the following factors:
- Aperture: Larger aperture telescopes allow more light-gathering, resulting in brighter and clearer images.
- Focal Length: Longer focal lengths provide higher magnification and are suitable for capturing distant objects.
- Mount Stability: A sturdy mount is crucial for stable and precise tracking of celestial objects during long exposure photography.
Camera:
Choosing the right camera is essential for astrophotography. Consider the following factors when selecting a camera:
- DSLRs or Mirrorless: These types of cameras offer interchangeable lenses and manual control over exposure settings, making them ideal for astrophotography.
- Sensor Size: Cameras with larger sensors generally produce better low-light performance and lower noise levels.
- ISO Performance: Look for cameras with good high ISO performance to capture faint details without excessive noise.
Adapters and Connectors:
To connect your camera to the telescope, you will need various adapters and connectors:
- T-Ring: A T-ring is a crucial adapter that connects your camera body to the telescope’s focusing tube.
- T-Adapter: This adapter connects the T-ring to the telescope’s visual back, allowing light to pass through.
- Focal Reducer: A focal reducer widens the field of view, allowing you to capture larger celestial objects or wide-field astrophotography.
Mount:
A stable mount is essential to track celestial objects accurately during long-exposure photography:
- Equatorial Mount: Equatorial mounts are designed to align with the Earth’s rotation and provide smooth and precise tracking.
- Go-To Mount: Go-To mounts have built-in computerized systems that automatically locate and track celestial objects, making them convenient for beginners.
Tracking Systems:
To achieve long-exposure photography, especially for deep-sky objects, you may require additional tracking systems:
- Auto-Guiding System: An auto-guiding system uses a separate guide camera to track and make corrections during long exposures, ensuring precise tracking and minimizing star trailing.
- Star Trackers: Compact and portable star trackers rotate your camera to compensate for the Earth’s rotation, allowing longer exposures without star trailing.
You can refer my already-written article about budget astrophotography star tracker if you want to know more about star tracking systems.
Accessories:
There are additional accessories that can enhance your astrophotography experience:
- Remote Shutter Release: A remote shutter release eliminates camera shake when capturing long exposures.
- Light Pollution Filters: Light pollution filters help reduce the impact of artificial light, enhancing contrast and details in your astrophotography. I already have an article about the best light pollution filters for galaxies.
- Power Supply: Make sure you have a reliable power supply to keep your equipment running throughout the imaging session.
By understanding and investing in the right equipment, you can maximize the potential of your astrophotography and capture breathtaking images of celestial objects.
Importance of Telescope Mounts in Photography
Telescope mounts are the unsung heroes of successful astrophotography.
Their role in tracking celestial objects across the sky, particularly in long-exposure photography, is vital. Without a stable and accurate mount, images can be blurry or show unwanted star trails.
Equatorial mounts, such as the Sky-Watcher EQ6-R Pro, are popular choices due to their ability to precisely track objects along the sky’s apparent motion.
A Guide to Digital Camera Adapters for Telescopes
Attaching a digital camera to a telescope requires an adapter – typically, a T-ring and T-adapter.
The T-ring attaches to your camera’s lens mount and the T-adapter to the telescope’s eyepiece holder, securely connecting the camera to the telescope.
Ensuring accurate focus, adapters like the Celestron T-Adapter and the Orion T-Ring have proven to be reliable in securing a camera to a telescope.
Telescopic Lens for Digital Camera
For those interested in astrophotography but not ready to invest in a full telescope setup, a telescopic lens for a digital camera is an option.
While these cannot match the magnification and light-gathering power of a telescope, they can still provide impressive images of the moon and brighter planets.
Lenses like the Sigma 150-600mm F5-6.3 DG OS HSM and the Canon EF 100-400mm f/4.5-5.6L IS II are examples of lenses that could be used for this purpose.
The main three techniques to take photos using a telescope
When it comes to taking photographs through a telescope, there are three main techniques that are widely used:
Prime Focus Photography:
In this method, the telescope acts as the camera lens, directly projecting the image onto the camera sensor.
The eyepiece is removed and the camera is attached directly to the telescope with the help of a special adapter.
This method is most commonly used for capturing deep-sky objects like galaxies, nebulae, and star clusters because it can take advantage of the telescope’s magnification and light gathering abilities.
Eyepiece Projection Photography:
This technique involves the camera lens focusing on the image produced by the telescope’s eyepiece, effectively taking a picture of what you would see if you were looking through the telescope.
An adapter is used to connect the camera to the eyepiece, and the camera lens stays on.
This technique is often used for planetary and lunar photography, as it allows for higher magnification.
Afocal Photography:
In this technique, both the eyepiece and the camera lens are used.
The camera is positioned such that it photographs the image produced by the eyepiece, similar to how your eye would see it.
This method is often used with smartphones or compact cameras and is suitable for lunar and planetary photography.
How to Take Photos Through a Telescope: 6 Methods
I hope to explain 6 methods that I tried in my astrophotography journey to taking photos through a telescope. So, let’s reveal them clearly one by one.
Hand – Held
Afocal photography is a simple method that can be practised by anyone with a telescope and a camera, be it a digital camera or one integrated into a smartphone.
This technique does not require any additional specialized equipment, although it may not yield consistent results and may require more time to achieve a clear shot.
To begin this method, set up your telescope and align it with the subject you wish to photograph. Take your time to ensure that the image is well-focused and sharp. Now, carefully hold your smartphone or camera, placing its lens directly against the eyepiece of the telescope.
By doing so, you will be able to see the subject through your camera’s viewfinder or screen. Be mindful of keeping your camera steady to avoid introducing motion blur.
When you’re ready, you can take the picture by pressing the capture button on your camera. Sometimes, It takes a few attempts to achieve the desired result, as stability is crucial for obtaining sharp images. Take care not to move the camera while capturing the shot.
Taped into Telescope
This technique expands on the previous method by using tape to secure the camera to the telescope, eliminating the need to hold it manually.
It is important to note that this approach is suitable only for lightweight cameras.
Attempting to tape a heavy DSLR camera to the telescope can disrupt the balance and potentially cause damage to both the telescope and the camera.
For optimal results, it is advisable to use clear tape or masking tape, as they are less likely to leave residue compared to duct tape.
Once the telescope is focused on the desired image, proceed with caution to tape the camera securely to the telescope, ensuring that the camera lens aligns with the eyepiece.
It might be necessary to readjust the telescope afterwards to maintain proper centering on the intended subject.
Now, you are ready to capture the shot. The advantage of this method is that shaking your hand is minimized, although pressing the camera’s button to take a photo can still introduce some movement. To mitigate this, using a remote control is recommended.
Inexpensive Bluetooth remotes are readily available and can conveniently operate the camera on your smartphone. However, finding a remote for a digital camera might be more challenging.
Remember, while this technique offers more stability compared to handheld afocal photography, it is essential to exercise care and ensure the balance of the setup to prevent any potential accidents.
Mounting Tripod
The tripod method offers a more convenient alternative to taping your camera to the telescope, minimizing shake and facilitating sharper photographs.
This approach eliminates the time-consuming process of taping and avoids the potential residue left behind. Here’s how you can achieve a similar effect using a tripod:
- Securely mount your camera or smartphone onto the tripod.
- Direct the telescope towards the celestial body you intend to photograph and adjust it until the image is in focus.
- Position the tripod in a way that aligns the camera with the telescope’s eyepiece, ensuring that the lens of the camera is against the eyepiece.
Now you are prepared to capture your shot. To prevent any unwanted movement during the exposure, using a remote control is highly recommended.
Alternatively, you can utilize timers as substitutes for a remote.
The advantage of the tripod method is the ease with which you can detach the camera and quickly set up the telescope for a different shot.
However, it’s worth noting that not all tripods allow for convenient alignment between the camera and the telescope’s eyepiece.
Therefore, it is important to consider this factor when shopping for a tripod specifically designed for telescope photography.
By employing this method, you can achieve stable images with reduced shakes and enjoy the flexibility of quickly transitioning between different shots.
Engaging with Camera Adapter
If you’re a photographer with a passion for astronomy and aiming to capture professional-quality images of the cosmos, utilizing a T-adapter and T-ring is the ideal method.
This approach allows you to harness the capabilities of your professional camera equipment, enabling you to achieve stunning astrophotography results.
To employ this method, you’ll need a T-ring and T-adapter, which will replace both the lenses on your camera and the eyepiece of the telescope.
This configuration essentially transforms your telescope into a powerful lens for your high-end camera, providing enhanced magnification and clarity.
It’s important to note that this method is compatible only with cameras that have removable lenses, such as DSLRs and mirrorless cameras. Point-and-shoot cameras are not suitable for this approach.
To get started, you’ll require the appropriate T-ring and T-adapter that fit your specific camera and telescope. Finding the right components might involve some research to ensure compatibility.
Once you have the necessary items, the process is relatively straightforward. Simply attach the T-ring to your camera and connect it securely to the T-adapter.
This setup allows you to directly focus your image through the camera, utilizing the full capabilities of your equipment. From there, you can capture your desired astrophotography shots.
Fortunately, T-rings and T-adapters are generally affordable, with a total cost of around $50. However, this assumes that you already possess a compatible camera and telescope.
By employing the T-adapter and T-ring method, you can leverage your professional camera equipment to capture breathtaking and high-quality images of celestial objects, merging your expertise in photography with the wonders of astronomy.
Using a Cell Phone Adapter
For those seeking an affordable, user-friendly, and widely accessible method of telescope photography, cell phone adapters are the perfect solution.
As smartphones have become commonplace, these adapters enable users to utilize their phone cameras for capturing stunning images through a telescope.
The adapter conveniently attaches directly to the telescope and is typically designed to be universally compatible, ensuring a seamless fit with various telescope models and smartphone types.
Once securely mounted, you can easily insert your phone into the adapter, aligning the lens of your phone’s camera with the telescope’s eyepiece.
With this setup, you can effortlessly capture photos using your smartphone through the telescope.
The entire setup process typically takes just a minute or two, allowing you to swiftly move on to photographing multiple targets without spending excessive time configuring the camera for each shot. For many individuals, this method proves to be the easiest and least frustrating approach to telescope photography.
By utilizing a cell phone adapter, you can leverage the capabilities of your smartphone camera to capture remarkable images through your telescope.
This straightforward and efficient method enables you to explore various celestial objects and enjoy the wonders of telescope photography without the hassle of complex setup procedures.
Eyepiece-Projection
While not applicable to all celestial subjects, it’s worth mentioning the technique of eyepiece projection for capturing close-up lunar shots.
However, this method is comparatively expensive compared to other telescope photography approaches.
Actually, it requires a high-end camera with a removable lens, such as a DSLR or mirrorless camera, along with additional equipment like a T-ring, T-adapter, and a specialized eyepiece that fits between the camera and the telescope to achieve increased magnification.
Once your setup is complete, the process involves focusing the telescope while observing the image through the camera.
This method enables capturing incredibly detailed close-ups of the moon’s surface. However, it is important to have a good understanding of how to adjust and optimize your camera’s settings to achieve the desired results.
Although eyepiece projection is a specialized and costly technique primarily used for lunar photography, it offers the potential for capturing intricate and high-resolution images of the moon.
Mastery of camera settings and a comprehensive understanding of the process are essential to achieve the best possible outcomes with this approach.
Conclusion
In conclusion, astrophotography through a telescope opens up a captivating realm of celestial wonders. By understanding the essential equipment, such as telescopes, cameras, adapters, and mounts, you can embark on an awe-inspiring journey to capture the beauty of the cosmos.
Choosing the right telescope involves considering factors like aperture, focal length, and mount stability. Selecting a suitable camera, whether it’s a DSLR or mirrorless, with features like sensor size and ISO performance, is crucial for capturing stunning images.
Understanding telescope-to-camera connections, such as adapters, T-rings, and focal reducers, ensures a secure and optimal setup.
Exploring various techniques, including prime focus, eyepiece projection, and cell phone adapters, allows for different approaches to capturing celestial objects.
Each method offers its unique advantages, providing opportunities for both amateur and professional astrophotographers.
By immersing yourself in this comprehensive guide and following the guidelines outlined, you can unlock the potential to create breathtaking astrophotography images and marvel at the wonders of the universe.
So, set up your equipment, embrace the darkness of the night sky, and let your creativity soar as you capture the magnificence of the cosmos through your telescope lens.
Justin Parker is a professional photographer and has been in the industry since 2007. He attended the University of Georgia. Justin combines his passion for photography and his interest in writing to give life to this blog which talks about photography in order to help and inspire young photographers.